
Simple Coffee Filter Wreath DIY {12 Months of Wreaths}

CoffeeFilterWreath_650
Welcome back to 12 Months of Wreaths!

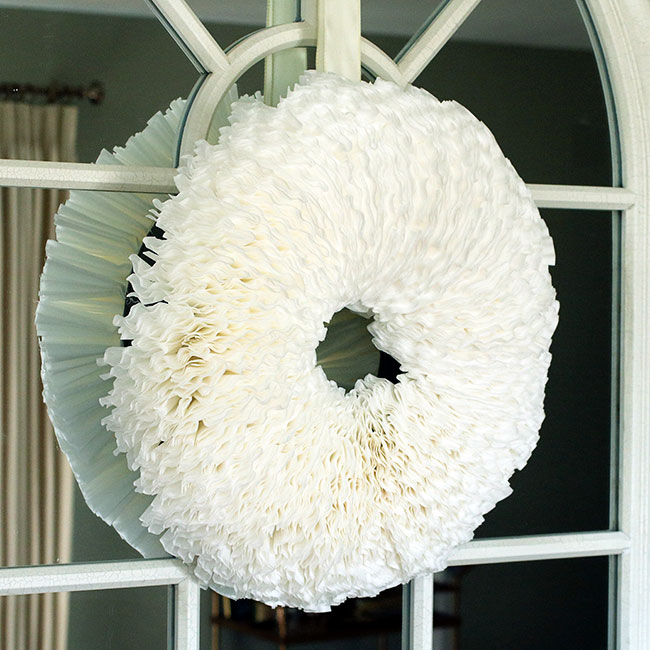
Hi everyone! Welcome back to our second month of 12 Months of Wreaths! This month, I wanted to work on a wreath that I could hang on our new cathedral mirror that is above our console table. I wanted something neutral and clean... I decided a coffee filter wreath would be perfect! These wreaths have been done many times, but this is the first one I've made and I'll be sharing the instructions below.


CoffeeWreath_Close1
I love the texture this wreath adds and you'd never think it is just hundreds of coffee filters glued to a wreath form!

Welcome to 12 Months of Wreaths - February!
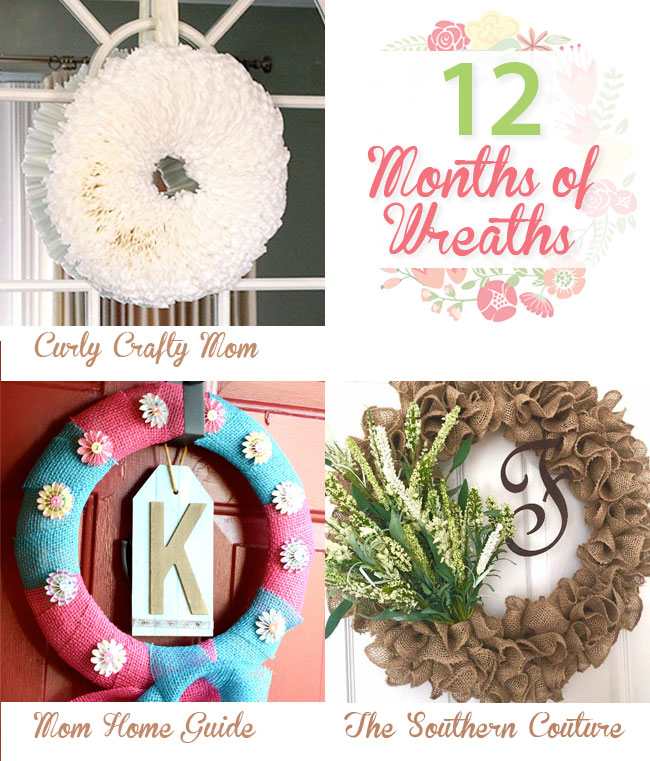
Follow your Hosts:
Carrie Curly Crafty Mom Blog | Facebook | Pinterest | Instagram | Twitter | Bloglovin’
Lauren at Mom Home Guide Blog | Facebook | Pinterest | Instagram | Twitter | Bloglovin’
Bethany at The Southern Couture Blog | Facebook | Pinterest | Instagram | Twitter | Google+ | Bloglovin’

Thanks again for joining us! We will be sharing a new wreath once a month in 2017! Be sure to stop by all of the hosts to see what wreath we came up with for the month!

Are you interested in sharing a wreath with us one (or more) months? We are accepting guest hosts! Email carrie (at) curlycraftymom (dot) com if you are interested!

CoffeeFilterWreath1
Now I will share with you how I created this gorgeous wreath!


How to Create a Simple Coffee Filter Wreath:
MakeWreath0
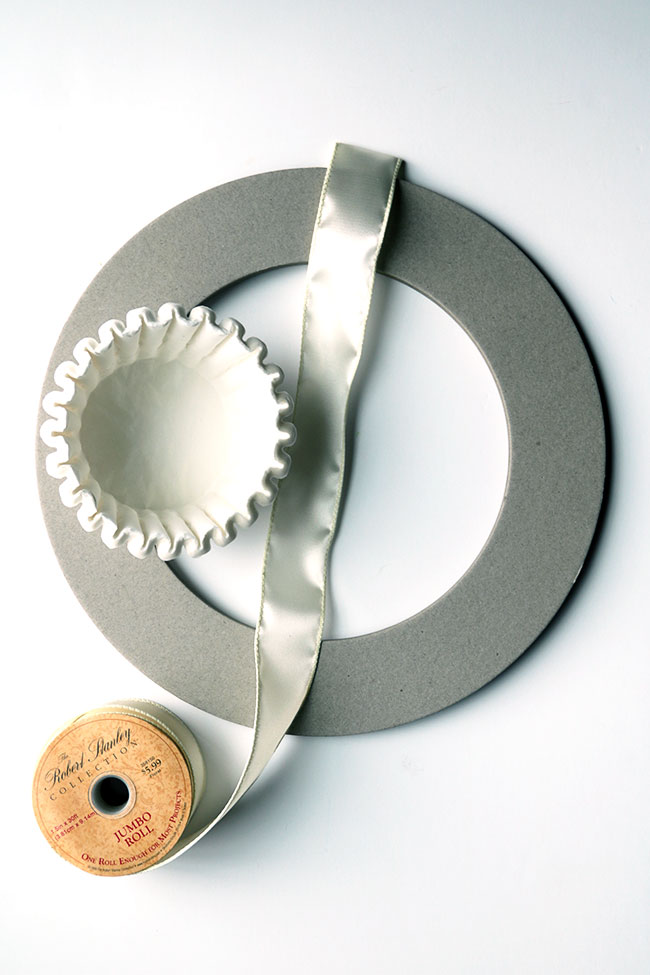
The supplies for this craft are basic, you just need a 12" flat wreath form, ribbon and coffee filters. I used 400 coffee filters for this wreath!


MakeWreath1
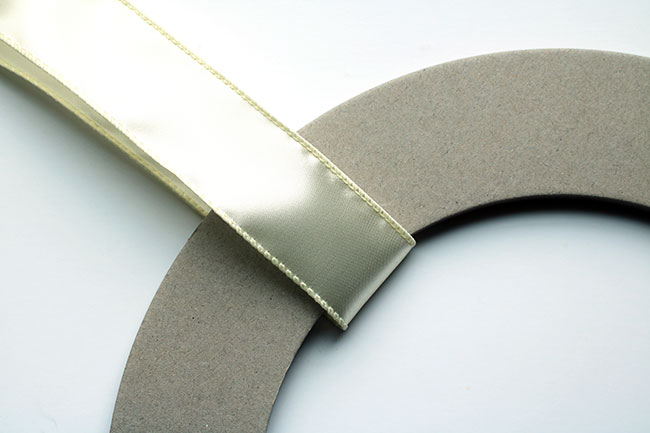
Tie your ribbon around the wreath form, make it long enough to be a hanger.


MakeWreath2 MakeWreath3
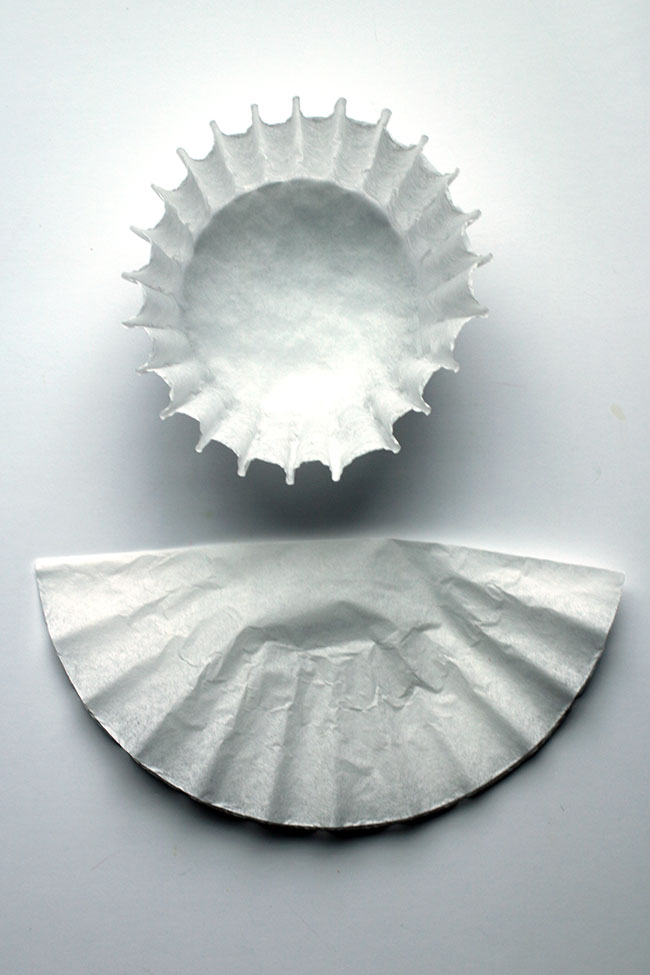
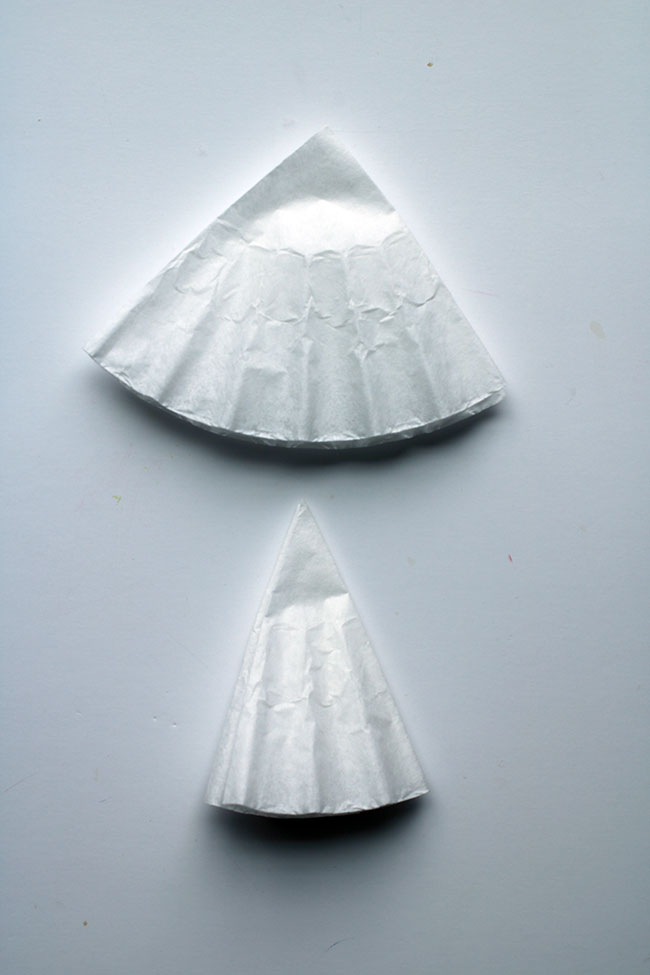
These pictures show you how to fold each coffee filter. Basically, you fold it in half three times.


MakeWreath4 MakeWreath5
Fold the tip to make a point. This point is what you'll hot glue to the wreath form. Then, hot glue each individual coffee filter down one by one in the same direction.


MakeWreath6
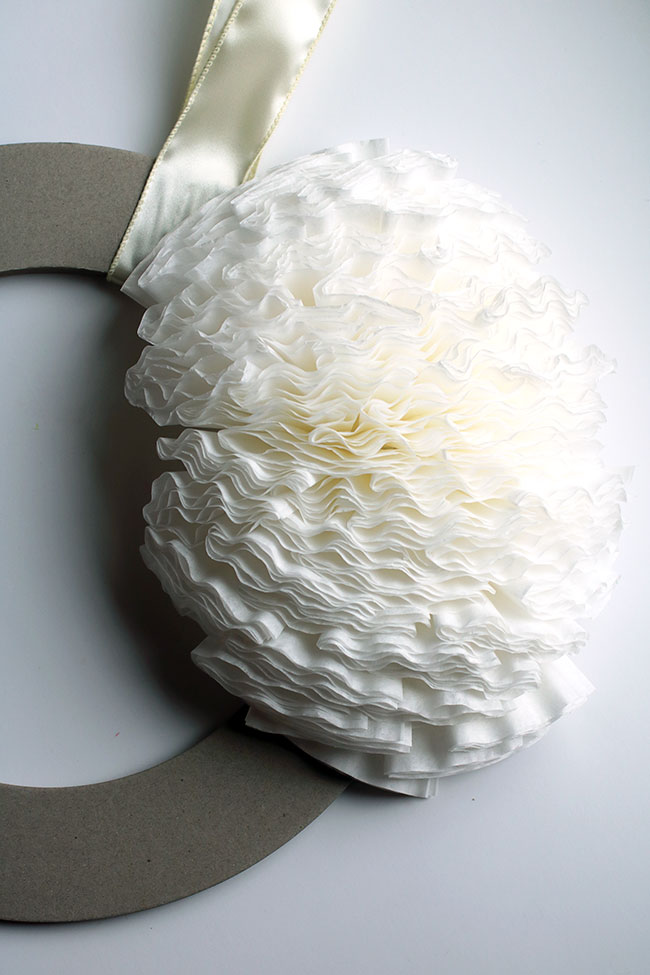
I think it took me 4-5 hours to make this entire wreath. I broke it up and worked on it an hour a day. It isn't hard, just time consuming.


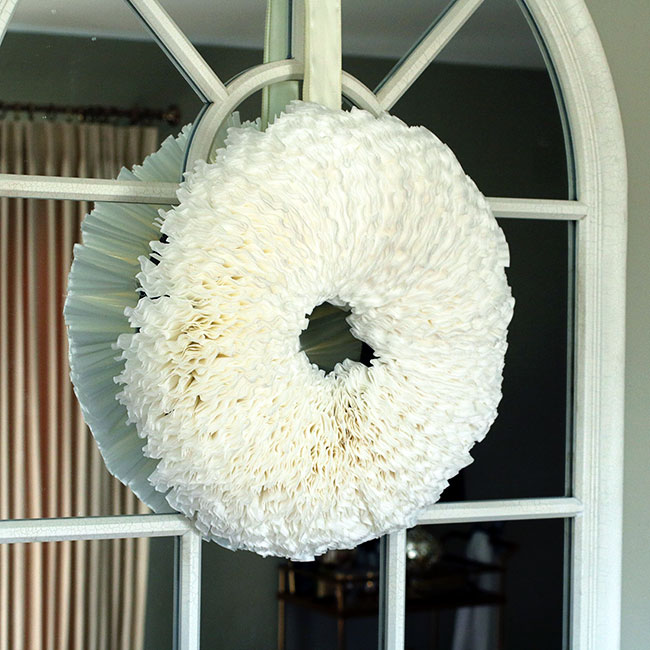
More Photos of the Wreath in the Room:

Room1
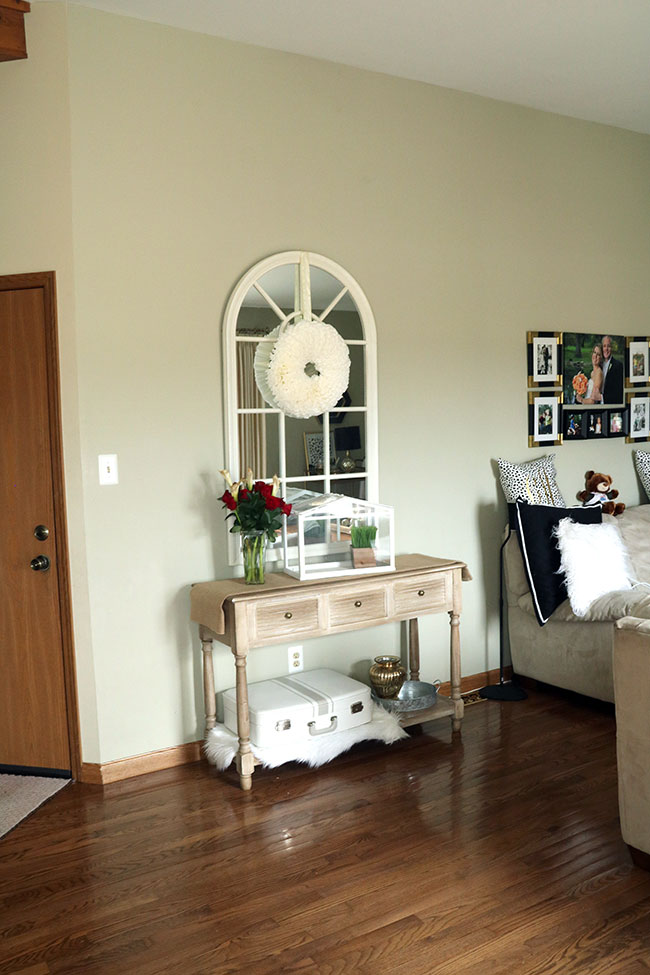
Here is the wreath in the room, I still need to decorate my console table for the spring, it's been pretty bare since the holidays.


CoffeeWreath_Close2
Just a gorgeous detail shot of the wreath.

Thanks for joining us this month! I can't wait to share our wreaths again next month with you!
SaveSave

Comments

Popular posts from this blog

5 Ways to Bring Spring Into Your Home

The weather here in St. Louis has gone from 70 degrees to tornado watches/warnings and now to possible snow/ice this weekend. Whew! I am SO ready for Spring and for Daylight Saving Time. Today I'm sharing with you how to bring Spring to your home sooner with 5 Ways To Bring Spring Into Your Home . Bringing a little Spring into your home is rather easy. You don't need to change up your entire decor, at least not yet... What I try to do is add little touches here and there. 1. Spring Wreaths One way that I bring Spring into my home is by placing a Spring wreath on my front door or on some of the interior doors in the home. My absolute favorite Spring wreath that I've done is my Split Pea Wreath below, but I'm currently working on a Tulip wreath which I'll be sharing in a couple of weeks! I'm also sharing a couple of other Spring wreaths that I've made below: Split Pea Wreath with Burlap Bow Some other Spring wreaths I've designed:   Simple Spring Hoop Wrea...

Creating a Wider Doorway

My kitchen has no outside walls. That means it has no windows directly to the outdoors. UGH. I love light, I love sunshine streaming through windows and lighting up my house. This was not the case in my kitchen. Last year I renovated the space and added a pass through window in one of the walls.  Now the sun can reach the kitchen - hooray!!  But it is still not a terribly well-lit space. Cue my desire to open the wall between the living and dining rooms - the dining room is the brightest room in the house.  That, however, will be a big job because the wall is a supporting wall (at least I'm treating it that way, even if the building inspector didn't think it was).  I decided to tackle the opening from the living room into the kitchen instead since I know for sure that wall isn't supporting. Read more »

Open House Sundays #10 - Cloches & Lavender

Welcome to Open House Sundays where we get a personal invitation to tour through a different blogger's house every week! This week's tour is courtesy of Cindy from Cloches and Lavender .  Cindy is one of the first bloggers I met when I began blogging, her home is brand new (she just moved in earlier this year) and it is GORGEOUS.  Cindy has the best faux painting skills in blogland.  Her pieces are beautifully done using appliqués in a lot of cases - they truly look antique!   Enjoy this Christmas tour of her new home! ***************** Read more »